
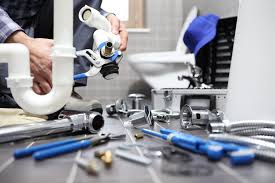
If you’re a homeowner, chances are that at some point you’re going to have to replace your toilet. It may be leaking or it may be getting old. Below are the steps that you’ll take to replace your toilet and the tools and materials you’ll need.
Once you have turned off your water at your shutoff, flush your toilet so that most of the water is removed from the bowl and tank. There will be a bit of water left in your bowl. Use your force-cup plunger so that the water’s forced into your drain line. Remove the water that remains from your tank using a bucket and sponge.
You’ll have to pop off your toilet’s trim caps at its base so that you can remove your old toilet. Then you want to loosen up and remove the washers and nuts on the toilet’s closet bolts which secure it to your floor. If you have rusty bolts, it’s possible that you’re going to have to remove them using a hacksaw. If you are working alone, you want to disconnect your tank from your bowl before you disconnect and remove your bowl. It’s going to be a lot easier to lift those pieces separately.
Once you have removed your washers and nuts on either side of your bowl, rock your toilet gently until you’re able to lift it up. Once the toilet’s removed, there’s going to be a line that’s open to your sewer system. If you take a rag and stuff it down into the hole you can prevent sewer gasses from coming into your home and keep your tools from falling in the hole.
Take your putty knife and use it to pry up and remove your existing wax seal. Inspect the underneath flange to ensure it isn’t cracked. Once you have done this, remove your rag from your hole. If you have a cracked flange, call your plumber. If your flange is okay, remove your rag and remove your closet bolts from your flange. Install your wax seal and then hook your new closet bolts in the slots on your flange.
Important: Don’t forget to remove your rag before you install the new seal. If you leave it in, it’s going to be a costly but common mistake.
With your seal and closet bolts in their places, you’ll be able to attach your bowl and tank to assemble your new toilet. Slide your tank bolts through the openings in your tank’s bottom. Line up the bolt’s shank with the holes that are in your toilet’s bowl and then drop your tank in place. Secure your tank to your bowl by tightening nuts on each of your tank bolts. All of the nuts should be evenly tightened until your tank is resting firmly on your bowl.
These are the steps that you will take when you are replacing a toilet. They’ll help it go a lot smoother for you and give you the guidance that you need to get the job done.
source: here
*
Be the first to comment.