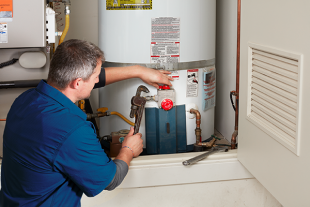
Like all other household electronics and appliances, it should always be a priority to have a working water heater that can reliably provide hot water for the entire family. Of course, like all the other conveniences that we have in our home, it is expected that the water heater would sometimes go on the fritz.
In light of this, it is important that you do regular maintenance checks on your water heater to minimize the risk of your water heater malfunctioning frequently. It is thus imperative that you follow this basic water heater maintenance checklist.
HOW WATER HEATERS WORK
Before attempting to do the basic maintenance checks on your heater, let us try to find out how our water heaters work at home. For starters, they usually look like big metal cylinders or tall drums that are located in your basement or in the laundry room. Basically water heaters provide warm water needed for your showers and dishwashers.
The basic components of the water heater are as follows:
Dip Tube – It is where the water enters the heater through at the top of the tank.
Tank – It is the core of the inner shell of the water heater. It is usually a heavy tank having a protective water liner that holds around forty to sixty gallons of hot water at scales of fifty to a hundred PSI (pounds per square inch) (PSI) – the standard pressure range of the typical residential water system. The outside part of the tank is covered with polyurethane foam or any type of insulating material.
Shut-Off valve – A valve that stops the water flow to the water heater. This is a separate component that is usually located outside and above the heater unit.
Thermostat – It is a thermometer and the heater’s temperature-control device.
Sacrificial Anode Rod – This part is made of either aluminum or magnesium. It has a steel core and is suspended in the water tank to help hinder corrosion.
Drain Valve – This is located near the bottom of the outside housing of the heater which makes it easier to empty the tank to replace its elements, remove sediment, or move the tank to a different location.
Heat-out Pipe – This part is suspended toward the of the water heater’s interior. Its heat-out pipe allows the hot water to exit from the unit.
MAINTAINING YOUR WATER HEATER
Probably, you must have spent a good time in finding high performance HVAC heating and cooling system for your home, it’s about time to do the maintenance check. It’s understandable that it might be dangerous and tweaking with the unit will only cause it to get damaged. If you are hesitant in doing the maintenance checks yourself, you have the option of seeking help from licensed HVAC professionals in your area.
Here are the basic steps in maintaining your water heater:
Determine the Type of Your Unit – Two of the common types of water heaters that are mostly present in homes are the gas and electric types. If ever you are having a hard time determining your water heater, you can try looking at the stickers that are embedded in your water heater.
Locating the Water Shut-Off Valve, Water Drain, and the Pressure Release Valve – If ever you are having trouble locating the shut-off valve, it is usually situated on the top of your water heater. You can also find the pressure release valve at the top as well near or beside the water shut-off valve. It is important that the piping on the other side of the wall and the entryway is not obstructed.
The water drain is situated at the bottom of the heater bearing a no-frills spout with threads so that the hose can be attached. (Reminder: It is advised that the threads should not be removed or thrown away for these will be needed for later.)
Turn Off the Fuel Supply/the Power – Turn off the gas or shut off the circuit breaker before doing maintenance work. Be sure to follow instructions if it is provided. Get a hose, bucket, and gloves to protect your hands from hot steam and water.
Turn Off the Water and Connect the Hose – simply turn off the water connected to the water heater and connect a hose to the water drain.
Turn On the Water Drain and Open the Pressure Release Valve – Carefully turn on the water drain in order to release the water from your water heater tank.
The liquid will drain from the hose but will eventually slow to a trickle and then stop due to the pressure release valve requiring to be opened to allow air to go into the tank. If ever you see signs of debris in the water, fret not; this is grime that has accumulated in the tank. Wait for ten to thirty minutes for all the water to drain.
Water Heater Drain Valve
Turn On Water to Flush Remaining Sediment – Take your bucket and place it below the water drain. As the pressure valve is still open, turning on the water to the water tank followed by turning on the water drain allows the remaining sediment to be flushed out of the unit.
Refilling – Be sure to make a last-minute check to see if the water is drained and the tank is completely turned off. Carefully close the pressure release valve and turn on the water to fill the tank. Once it is full, turn on the gas or the circuit breaker of the water heater unit. Do this with utmost caution.


